Showing posts with label fruits. Show all posts

Thursday, July 21, 2011

"Georgia Peach" Peaches and Cream Pie

Aerial View of Summertime

White peaches are one of my all-time favorite fruits. I love the way the juice runs down your hands when you bite into a good peach, how the skin falls right off when you blanch them, how they perfume your entire kitchen when you leave them to ripen on the counter top (I have a very small kitchen, mind you). 

But it's hard to find a good white peach in California. They are few and far between. Too many times, they are picked before they are ready and shipped over on giant trucks, either bruised or eternally unripened. So when I found some at the local farmer's market that I could smell from a few feet away, I knew it was time for a peach pie. 

And not just any old peach pie, but a traditional peaches and cream pie, which tastes pretty much exactly like peach ice cream, except it warms your mouth and the fruit almost melts on your tongue. Then the crust adds a contrasting crunchiness that will have you coming back for seconds. Or, in my case, for breakfast, since I've been eating this one before work for two days in a row.

It's also a very simple recipe. So go ahead and try it. You've got nothing to lose and everything to gain (literally, you might gain a few pounds after eating the entire pie to yourself, so share it please). 

Pretty crust, sculpted by my talented roommate, Maria, and my wonderful friend, Marie

This recipe also taught me how to blanch a peach, which I highly recommend you do in order to remove the peach skin. It has never been appealing to me to leave the skin on any fruit in a pie, and if you try to remove it with a peeler, you'll lose way too much of the peach-meat. Trust me. 

My roommate made little musical notes with leftover crust (look sideways, you'll see it)

Peaches and Cream Pie 
Recipe Adapted from Nathalie Dupree's New Southern Cooking

Ingredients
one 9" pie shell (I used a butter-shortening crust with 1 added tbsp sugar)
4 peaches, skinned and sliced 
3/4 cup sugar
1/2 cup all-purpose flour
1 cup heavy cream
OPTIONAL: A generous sprinkling of brown sugar
OPTIONAL: Butter and egg for a butter-egg wash

Directions
1. Preheat the oven to 375F. Grease a 9" pie pan. Roll out the pie crust and line the pan with it. 

2. Mix together the flour and sugar. Pour 1/3 of the mixture into the bottom of the crust. 

3. Place the peaches into the crust. Add as many or as little as you want, but I like myself a really, really peachy pie. 

4. Pour the rest of the sugar-flour mixture over the peaches. Pour the heavy cream over everything. Stir the peaches around so they are completely covered in cream. They can be above the cream, but you want them all to have a chance to have a taste of it!

5. OPTIONAL STEP: Sprinkle a generous helping (about 1 tbsp) of brown sugar over the top. Alternatively, you can do this halfway through baking. Cover the crust with an egg wash and butter. 

6. Bake for 50-70 minutes, or until the middle is just set. You'll know it's not ready if you jiggle it, and the middle shakes. If the crust gets too brown, cover it with a ring of foil. Serve hot or cool.

NOTE: If you're not happy with your peaches, add in a nectarine or two instead. You want the brightest, juiciest fruit for this. 


This is what the pie looked like after I took a slice for breakfast yesterday morning. Then I ate said slice while watching the sun rise over San Francisco. Not too shabby. I love my city. I love my pie. 

Saturday, July 16, 2011

Strawberry Radish Summer Salad

After a friend delivered a giant bag of fresh butter lettuce and radishes to my house straight from her garden, I started craving a humongous salad. Like, enormous. No, bigger than enormous. I kind of wanted to be able to live in the salad.

But I was realistic about it. Also, I was realistic about the fact that that sounds totally crazy and most people are not in LOVE with salad... until they try one of mine. So go ahead and indulge in this simple treat. It's only about 150 calories for the entire meal. Which is why I had a huge hunk of tri tip with it. That part is optional.

I apologize for the awful photo quality. I took these at my parent's house and only had my iPod instead of my Nikon.


Strawberry Radish Summer Salad

Ingredients (approximations; you can use whatever ratio or variation you like)
6-8 radishes, sliced thinly
10 strawberries, sliced
3 cups butter lettuce, loosely packed
handful of sliced almonds
part of a red onion, diced
3 celery stalks, thinly sliced
Balsamic vinegar (I used a fig balsamic that was to die for)
Olive Oil

Directions
Combine all ingredients (up to the vinegar and oil) in a large salad bowl. In a small bowl, mix together your preferred ratio of olive oil and vinegar and pour over individual servings. If you have some feta or chevre lying around, throw some of that on there. As I always say, Do whatever. Just do what tastes good.

Wednesday, June 15, 2011

"That's SO in Season" Fruit Pies


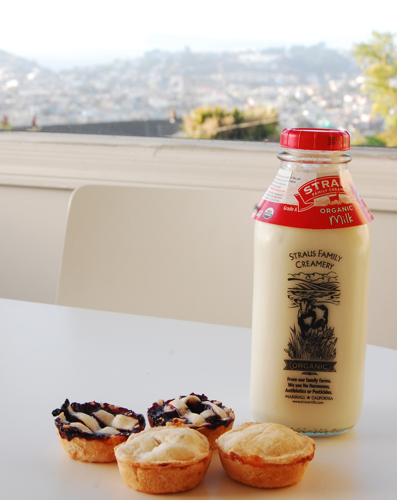
Two nights ago, I spent four hours frantically baking miniature pies and cookies in my kitchen. Though the first batch was a disaster (more on this in future posts about pie crust problems), the second batch was juuust lovely. I mean, look at those little tiny pies up there. Adorbs. I made blueberry, apricot, and peach pies for a friend in LA. Then I sent everything off in a big box in the morning. UPS says it will arrive at his doorstep in about an hour. What can I say? He's a lucky man.

My roommate named these pies the "That's SO in season" pies after a saying that her best friend always uses. Instead of referring to things as "awesome" or "sweet," he says "Dude... that's so in season." It's a little joke about the smugness of San Franciscans and their locavore/organic/all-natural/granola tendencies, but it's also just a hilarious and strangely apt way of saying that something is just right or just as it was meant to be. 

Fruit pies are a southern summer staple. In my house, they were served with homemade ice cream, whipped cream, or Cool Whip. Sigh. Drool.

Here are some photos followed by a foolproof recipe for seasonal fruit pies.
This image via makeandtake; it shows how to cut out the mini crusts with Tupperware
Pressing Pie Dough into Tins
Cut out a smaller top for the pie, and make sure to press it firmly onto the base
It's super easy to make little lattice crusts for the blueberry pies. They're juicy, so this works well for them.
Easy as Pie (Note: pie is not easy)
Then sprinkle with sugar, wrap 'em up, send 'em off


"That's SO IN SEASON" Fruit Pies
Ingredients
Pie dough of your choice (enough for a 9" pie pan)
4 cups of seasonal fruit, sliced (I split this into 4 bowls and made 4 types of fillings)
3 tbsp cornstarch (or flour, but I prefer cornstarch because it congeals better)
3/4 cup sugar
Squeeze of a lemon
Pinch of nutmeg
1 tsp cinnamon
OPTIONAL: Milk (for brushing over the tops before baking)
OPTIONAL: Powdered sugar (for sprinkling over the tops after baking)

Directions
1. Preheat the oven to 325F. Cut the pie crust out into circles and press up against the sides of a non-stick muffin tin.
2. Mix together the fruit, cornstarch, flour, and spices. Squeeze the juice of a lemon over everything, depending on how tart you like your pies.
3. Pour into mini pie crusts. Cut out tops for the crusts and press them onto the bases, or create little lattice crusts from your leftover pie dough pieces.
4. Optional: Brush with milk (this will make them shiny and pretty for presentation purposes)
5. Bake for 25-30 minutes or until tops are slightly brown. Remove from oven and allow to sit in pan for about 10 minutes to cool. Remove from pan by inserting a knife around the edges. The pies should pop right out. If they don't, your crust is a wee bit too, well, crusty. You've either added too much fat, not enough water, or you didn't mix the dough well enough. Take heed. Learn from the process. It's very zen.
6. Let cool on a wire rack. You can sprinkle them with powdered sugar once they're cool, but these babies taste best when they're warm from the oven. 

Enjoy these. After all, they're SO in season.

Flour and Sugar,
Carrie Melissa

Monday, June 13, 2011

Friday's Baking Experiment Gone Awry: Mini Blackberry Cobblers

So, last Friday, I took it upon myself to experiment a bit in the kitchen after I got out of work early for summer hours. I was thinking I'd make something wholesome and delicious, with a burst of summertime berry flavor: Enter blackberry cobbler.

Then I was thought, Wait. Maybe I don't want to put in a whole cup of refined white sugar. So, instead, I used Maryville, TN honey instead. Boy was that a mistake. I mean, the honey tastes brilliant, but I forgot to halve it as I had cut the rest of the recipe in half. My berries were swimming in honey. Wooooopsies.

I managed to save some of the honey and put it in a separate, blackberry-fuzz honey tupperware container and adjust the measurements pretty accurately.

In the end, the cobblers were deeelicious, but so messy that I didn't bother bringing them to the party I attended that night. Instead, I put them in some Corningware and called it a day. Then ate them when I got home from said party at night. :)

Here is the original recipe from In Erika's Kitchen. I replaced the sugar with honey (all you do to add honey into a recipe is to use the same amount in place of the sugar that is called for, and then reduce the liquid - in this case, milk - in the recipe by 1/4 cup).


Traditional Blackberry Cobbler 

  • 2 cups blackberries
  • 1 cup sugar
  • 1 stick (1/2 cup) butter
  • 1 cup self-rising flour (or 1 cup all-purpose flour plus 1/2 tsp baking powder)
  • 1 cup milk
Toss the blackberries with the sugar in a large bowl. Let sit 30 minutes. 

Heat the oven to 375 degrees. Put the butter in an 8-inch square baking dish and stick the dish in the oven. While the butter melts, whisk together the flour and milk in another bowl, plus any juice that's come out of the berries.

When the butter is melted and bubbling, remove the pan from the oven. Pour the flour mixture over the butter - do not stir. Pour the sugared berries on top of the batter, again without stirring. Return the pan to the oven and bake 30-40 minutes, until the cobbler is bubbling and the juices threaten to escape the pan at any moment. If you're thinking ahead and you hate cleaning your oven as much as I do, put a piece of foil on the rack under the cobbler, just in case the juices succeed.

Cool 15 minutes in the pan before serving. Whipped cream is always welcome on top of blackberry cobbler.


Flour and Sugar,
Carrie Melissa